How to setup Shadcn/ui in a React Application - Without Typescript
A step-by-step procedure to setting up shadcn/ui in a react javascript application
Are you one of those developers who is a lover of the recent and trending UI component library: shadcn/ui, but tends to be stuck at the point where it requires you to work with typescript because it is the default use case and style for the UI components. This article is aimed at helping and guiding anyone on how to set up shadcn/ui in a react application that uses javascript (Without the use of any typescript).
Prerequisite
Knowledge of Javascript
Knowledge of React and JSX
Project Setup
Kindly note that the codebase for this article will be bootstrapped using Vite. The first thing to do is create a new project using the vite command below:
npm create vite@latest
This will require you to provide some information and options for configuration. You can select all the options like the one below:

After selecting the options, the new project directory will be created and it should be similar to the setup in the image below:

The next step is to follow the instructions in the command line terminal. The first is to navigate into the directory (which in our case will be “cd react-shadcn-javascript”), then run “npm install” to install all required dependencies of the project.
After doing that, you can start the project using the command: “npm run dev”. This will start the application and your application should be accessible via the browser page:

Adding Tailwind Configuration
The next step will be to configure the tailwind in the project. This step is required before you can use shadcn/ui in your application. Tailwind can be configured in the project by running the commands below sequentially:
npm install -D tailwindcss postcss autoprefixer: This is used to install the required tailwind dependencies in the project
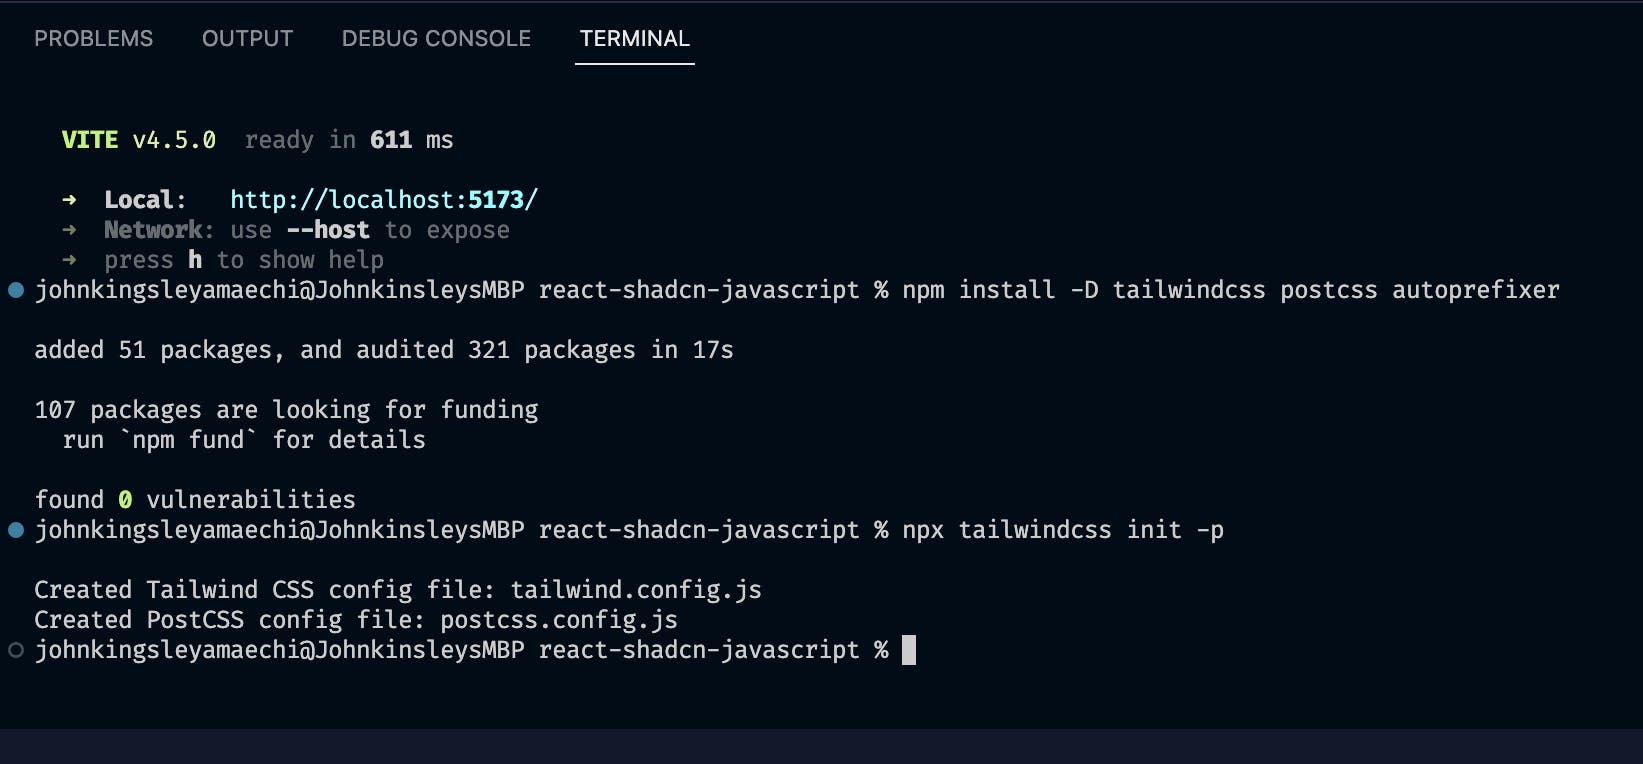
npx tailwindcss init -p: This command initializes and creates all the required files for Tailwind.
After running both commands, you should now have new files added to your project:

Path Configuration
The next step will be to set up the configuration for your path to resolve all path-related errors. Locate the vite.config.js file in your project directory and replace its content with the code below:
import path from "path"
import react from "@vitejs/plugin-react"
import { defineConfig } from "vite"

// https://vitejs.dev/config/
export default defineConfig({
 plugins: [react()],
 resolve: {
   alias: {
     "@": path.resolve(__dirname, "./src"),
   },
 },
})
Then, create a new file named jsconfig.json. And paste the code below inside it:
{
   "compilerOptions": {
       "baseUrl": ".",
       "paths": {
         "@/*": [
           "./src/*"
         ]
       }
   }
}
Now, you can go ahead and set up the shadcn/ui in your project.
Setting up Shadcn/ui
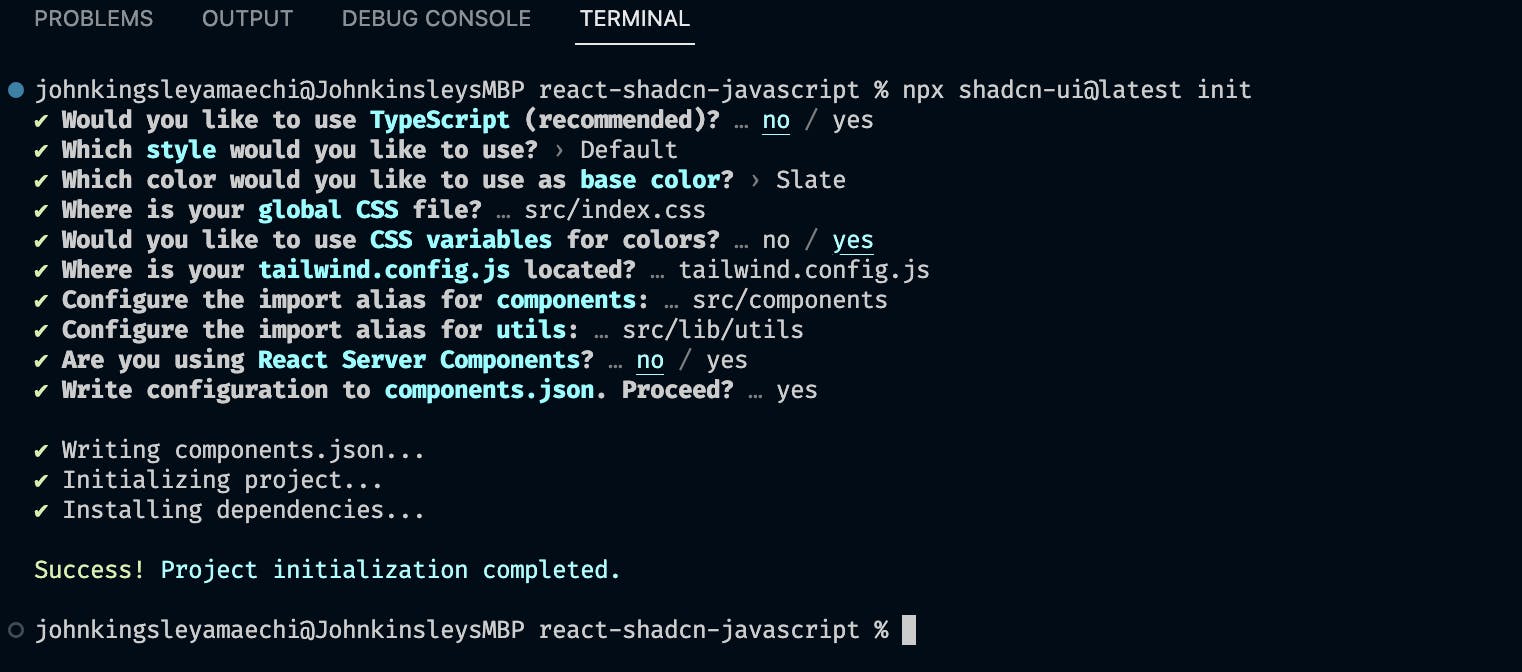
To set up shadcn/ui, you have to make use of its cli command to create all required files automatically. The command for creating that is: “npx shadcn-ui@latest init”. This will require you to select some options for configuration. You can use the pre-selected options below:

You can see from our pre-selected options (via the image above) that we have selected not to use typescript and also stated where we want our components and utils to be created.
Now, you can go ahead and add one of the shadcn/ui components. Let's introduce the button component into our application. To add the button to your project, run the command below in your terminal where the project resides:
npx shadcn-ui@latest add button
This would create a new UI folder inside the component directory. Your project directory should look like this:

You've successfully added one of the components of shadcn/ui. Now let’s use the component directly inside the App.jsx file.
Before you go ahead and use the component, you will need to change the value of the utils path inside our component (button). Locate where the import of the utils was done and change it to:
import { cn } from "../../lib/utils"
Now you can go ahead and use the component inside your App.js file. Replace the content of your app.js file with the code below:
import { useState } from 'react'
import reactLogo from './assets/react.svg'
import viteLogo from '/vite.svg'
import './App.css'
import { Button } from './components/ui/button';

function App() {
 const [count, setCount] = useState(0)
 return (
   <>
     <Button>Secondary</Button> <br /><br />
     <Button variant="destructive">Here</Button> <br /><br />
     <Button variant="secondary">Secondary</Button> <br /><br />
     <Button variant="ghost">Secondary</Button> <br /><br />
   </>
 )
}

export default App
This should result in changes in your browser (showcasing the button component being used):

Now you have been able to make use of the shadcn/ui button component in your application. This same process applies to the use of other components of shadcn/ui (Like the alert, card, etc).
Conclusion
Looking at the process we followed to integrate shadcn/ui, it is clear that we didn’t have to make use of typescript at any point during the whole setup. To learn more about shadcn/ui, you can visit the official documentation. To get the codebase of the article, you can find it in my GitHub repository (Kindly drop a star if you find it useful
Support
If you found this article helpful and interesting, I would appreciate the comments, likes, and contributions to anything that was meant to be covered and omitted. Kindly follow me for further articles on various Frontend and Backend aspects of software engineering.
